This tutorial will show you how to get started using Core Plot in your projects. I will explain how to use it on an iOS project, but if you want to use it on a Mac application, it will be useful as well, as Core Plot has abstracted the differences between the platforms, so what you learn for one platform will be useful also for the other one. This tutorial expects that you use Xcode 4.x and as such, the descriptions of the windows and menus will match that version. You can use Core Plot perfectly well with Xcode 3, just take into account that the descriptions might not match exactly your environment, please correct appropiately.
When we go to the Core Plot home page at http://code.google.com/p/core-plot/, we see a featured download of the relase 0.9, named CorePlot_0.9.zip. Core Plot is about to release version 1.0, so by the time you read this that could very well be the current version. In any case, grab the file and unzip it, and take note of where you did that.
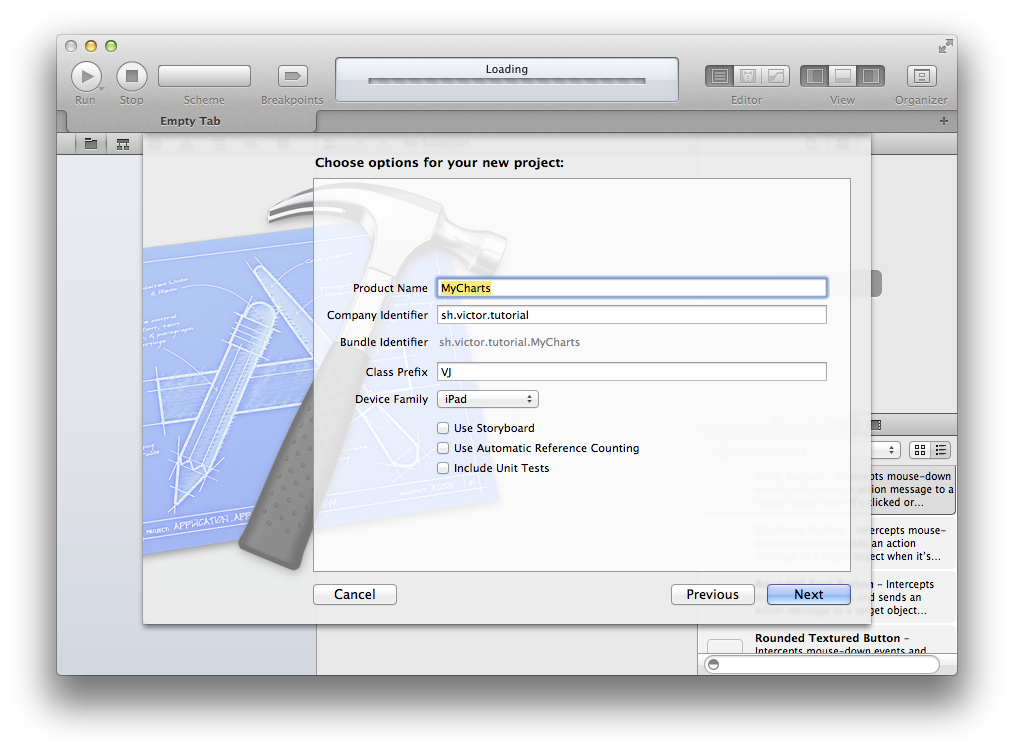
To begin, let’s create a Single View based iPad app project. I chose an iPad app because it has a bigger screen and allows me to better show what I’m telling. Feel free to follow along on an iPhone project – as long as you change the dimensions appropriately.
The next step is to add the Core Plot libraries to your project. When Core Plot was in heavy development, it changed very fast, so it made sense to incorporate it as a subproject of ours, and made it a dependency so that it was rebuilt every time it changed. Nowadays, with the final 1.0 release so close, it makes more sense to just add it as a static library.
There are three ways to go about adding a dependent library to your project.
To include it statically, drag the libCorePlot-CocoaTouch.a file and the CorePlotHeaders folder from the Binaries/iOS directory of the unpacked package into your project –I like to create a 3rd Party group for this purpose–, and when asked, tell Xcode to copy the included files. This creates a copy of the files in your project directory. The advantage of doing it in this way is that the project is self-contained, and that’s why I chose this way in this tutorial, I want you to be able to build the project and run it without extra dependencies. The con is that, if you use the same library in your projects extensively, there is a lot of duplication, and you need to update each copy separately. Also, you need to commit the files to your repo which, in the case of compiled binaries, is an ugly proposition.
To overcome the previous problem, that of duplication, you can tell Xcode that the dependent library lives elsewhere. You can leave the dependent library on the directory where you unpacked it and just add a reference to it to your project. That means that, if you update the library, the next time you build your project, the new version will be picked up. So, there is no code duplication and you don’t need to update each project that uses your library separately (sometimes this is not what you want. If your project only works with a specific version of a library, you may need to keep different versions of the library in separate places and have each project use the correct one.)
In addition, there is the disadvantage that each developer checking out the project needs to keep the libraries in the same path that the developer who added it had, either an absolute path, or a relative path (depending on how it was added). If you move the library for some reason, you need to make sure to update the project as well.
Adding a dependency as a reference to your project is easy. Do it the same way as before, but when asked, make sure that the library is NOT added as a copy this time. Once they are added, you can select each of the included files in the Project Navigator (⌘1) and, in the File Inspector (⌥⌘1), check it’s location to specify if the path should be given as an absolute path, or relative to one of a series of directories: the Group, the Project, the Build Products, the Developer Directory or the SDK itself. Depending on how you intend to collaborate on this project, you will need to select one or the other.
If you want to distribute your project widely (such as an open source project) but don’t want the rigidity of having the other collaborators reproduce the layout of your project directories, there’s an option that will give you a lot of flexibility. And that is, defining a source tree. A source tree is a kind of environment variable that points to a specific directory, and that you can substitute when specifying the path of an included header or library file. Then, using these source trees in your project, you give your collaborators the option of placing the libraries wherever they feel like, because as long as they define a source tree rooted in that directory, Xcode will find the libraries, and your repository will be free of hardcoded paths and binaries.
For example, if I were distributing an open source app which needed Core Plot, but I weren’t worried that you needed a bit of footwork before starting to use it, I would have defined a source tree (in Xcode’s preferences, in the Location Tab, under the Source Trees subtab), named CPROOT, and set with a path that pointed to the unpacked Core Plot folder. Then, in the location field of the File Inspector, a new option would appear, “relative to Core Plot source root” (the display name I gave it). If you were to examine the project file itself, you’d see that the path would start with something like ${CPROOT}/Binaries/iOS
Each of my collaborators would be expected to do the same, but they would be able to unpack the Core Plot libraries wherever they wanted, and just create the Source Tree accordingly.
If you use a DVCS like git, you have the option of including a whole project into your main project folder, and have your DVCS manage it as a separate repository, pointing to a different URL. For example, in git that would be a submodule, and some lesser SCMs such as Subversion can include externals as well.
In that way, you avoid the hassle of including binaries in your main project repo and of having to restrict yourself to specifc library versions. Since this kind of setup is specific to your SCM of choice, I won’t be giving specific details, just mention the possibility. Once your external project is checked out into your main project folder, it behaves exactly the same as the first case.
Oh and by the way, there’s the option of defining the library project as a separate project and include it in your workspace under Xcode 4, and then just use the library normally. After testing this approach during Xcode 4 betas, I don’t like it that much, because it combines the disadvantages of the different options. I think it only makes sense if you’re the creator of the library as well, otherwise, it’s a bit of a mess and not entirely reliable.